Decorating Dog Treats with Icing that Hardens
Time to read 2 min
There are a variety of dog treat icing that hardens and frosting recipes but many of them end up cracking over a few days. If you are reading this blog it's most likely because you have purchased an dog icing or frosting that dries hard without refrigeration and still have questions on how to use it without wasting any of the product.
Below are step by step tips and answers to commonly asked questions about Pastries 4 Pets' Icing (not frosting).

P4P Icing that Hardens - Decorating Tips
Pastries Pets Icings are a lot of fun to use but practice does make perfect. Below are some great tips to know while learning how to use our icing products. Remember, your dog will love to eat any of your mistakes! But, in reality, be patient and have fun!
- The icing is best used on treats and can be used on dry & moist cakes. These tips will be for using it on hard treats.
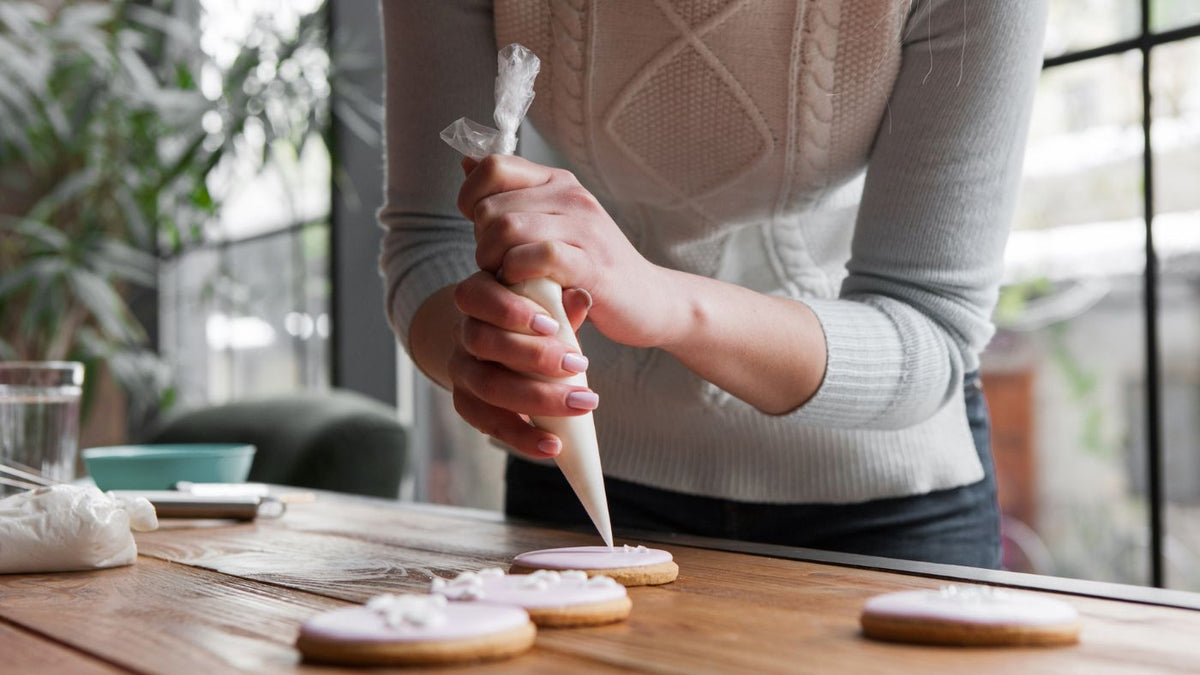
- Most people use disposable decorating bags with cake decorating tips, Wilton tip #2 works well for writing or detail work and tip #3 works well for filling in large areas. Others use the plastic candy melt bottles that look like plastic squeeze ketchup/mustard bottles. Some dip their treats or use spatulas to coat them. There really is no right or wrong way…
- You’ll also need water and a tablespoon... perhaps some food colors too. Human grade food color works, so does all natural food colors and powdered food colors. Once again, personal preference…
- When mixing water with the icing mix, start with less water and gradually add more to get the consistency you want. You might want a thicker icing to write or add details and a thinner icing to “flood” the background. If you add too much water, just add more mix….
- If you choose to flood your background by using a decorating bag, it’s best to outline the edges of your treat then fill/flood in the middle immediately after.
- If your original treat is cracked…. Don’t ice it, the crack from the dog treat with come through and crack your icing within a couple of days.
- Store your powder icing in the sealed bag or sealed container in a cool, dry location for a year. Once your treats are decorated the icing will have the same shelf life as your treat.
- It is best to let your iced treats dry overnight and 24 hours to be completely dry. Be sure to air dry your treats, they will not dry in the refrigerator.
- Our icing dries off-white, for a true white you can add white food color.
- Mix at a low speed to prevent air bubbles. If you have a lot of air bubbles your icing might be too thin. You can add a little more dry icing mix to thicken up the icing.
- Some people put iced treats in their ovens at 200 – 250 degrees for 5-10 minutes to speed up drying.
Decorating with Dog Treat Icing that Hardens - Video Tutorial
We find that video tutorials are very helpful when learning and practicing with a product that might be new to you. The video below explains and shows how to mix and use Pastries 4 Pets Icing products, have fun and happy baking!
How to Start a Dog Treat Business Classes - Online
For step by step, in-depth, personalized classes on "How to Make Money Baking and Selling Custom, Healthy Dog Treats From your Own Home or Storefront" check out our course offerings here: Online Courses and Workshops